Using XAI Control to Integrate GitHub Marketplace's Free Models into Any Application
GitHub has launched the exciting GitHub Models. It offers a range of powerful AI model APIs, such as openai/gpt-4o and xai/grok-3-mini, which are "Free to use".
However, these free models are subject to Rate limits, which can become a bottleneck as your application scales. You might also want to use these models uniformly across your own scripts, automation workflows, or third-party clients like LobeChat and NextChat.
XAI Control is the perfect solution. It acts as a powerful "Cloud AI Router" that not only converts your access to GitHub Models into a standard OpenAI API interface but also helps you easily bypass rate limits through its core load balancing design.
Core Advantages:
- Unified API Interface: Seamlessly integrate GitHub Models into any tool or application that supports the OpenAI API.
- Break Rate Limits: Achieve load balancing through multi-key rotation, effectively multiplying your request limits.
- High Availability: When a key becomes invalid or hits its rate limit, the system automatically switches to the next available key, ensuring uninterrupted service.
- Enterprise-Grade Management: Benefit from powerful features like unified key management, security protection, and cost control provided by XAI Control.
Step 1: Obtain Multiple GitHub Personal Access Tokens (PATs)
To implement load balancing, we need to prepare multiple GitHub accounts.
- Log in to your GitHub account.
- Click your profile picture in the top-right corner and go to Settings.
- At the bottom of the left-hand menu, find and click Developer settings.
- Select Personal access tokens -> Tokens (classic).
- Click Generate new token -> Generate new token (classic).
- Note: Give your token a descriptive name, such as
xai-key-1. - Expiration: Choose a suitable expiration date.
- Select scopes: You do not need to select any scopes.
- Click Generate token at the bottom of the page.
- Important: Immediately copy the generated token (starting with
ghp_) and store it securely. - Repeat the steps above to generate as many tokens as you need (e.g.,
pat-1,pat-2...).
Step 2: Configure the Load Balancing Group in XAI Control
This is the key step to making it all work. We will use XAI Control's Level grouping concept to configure load balancing.
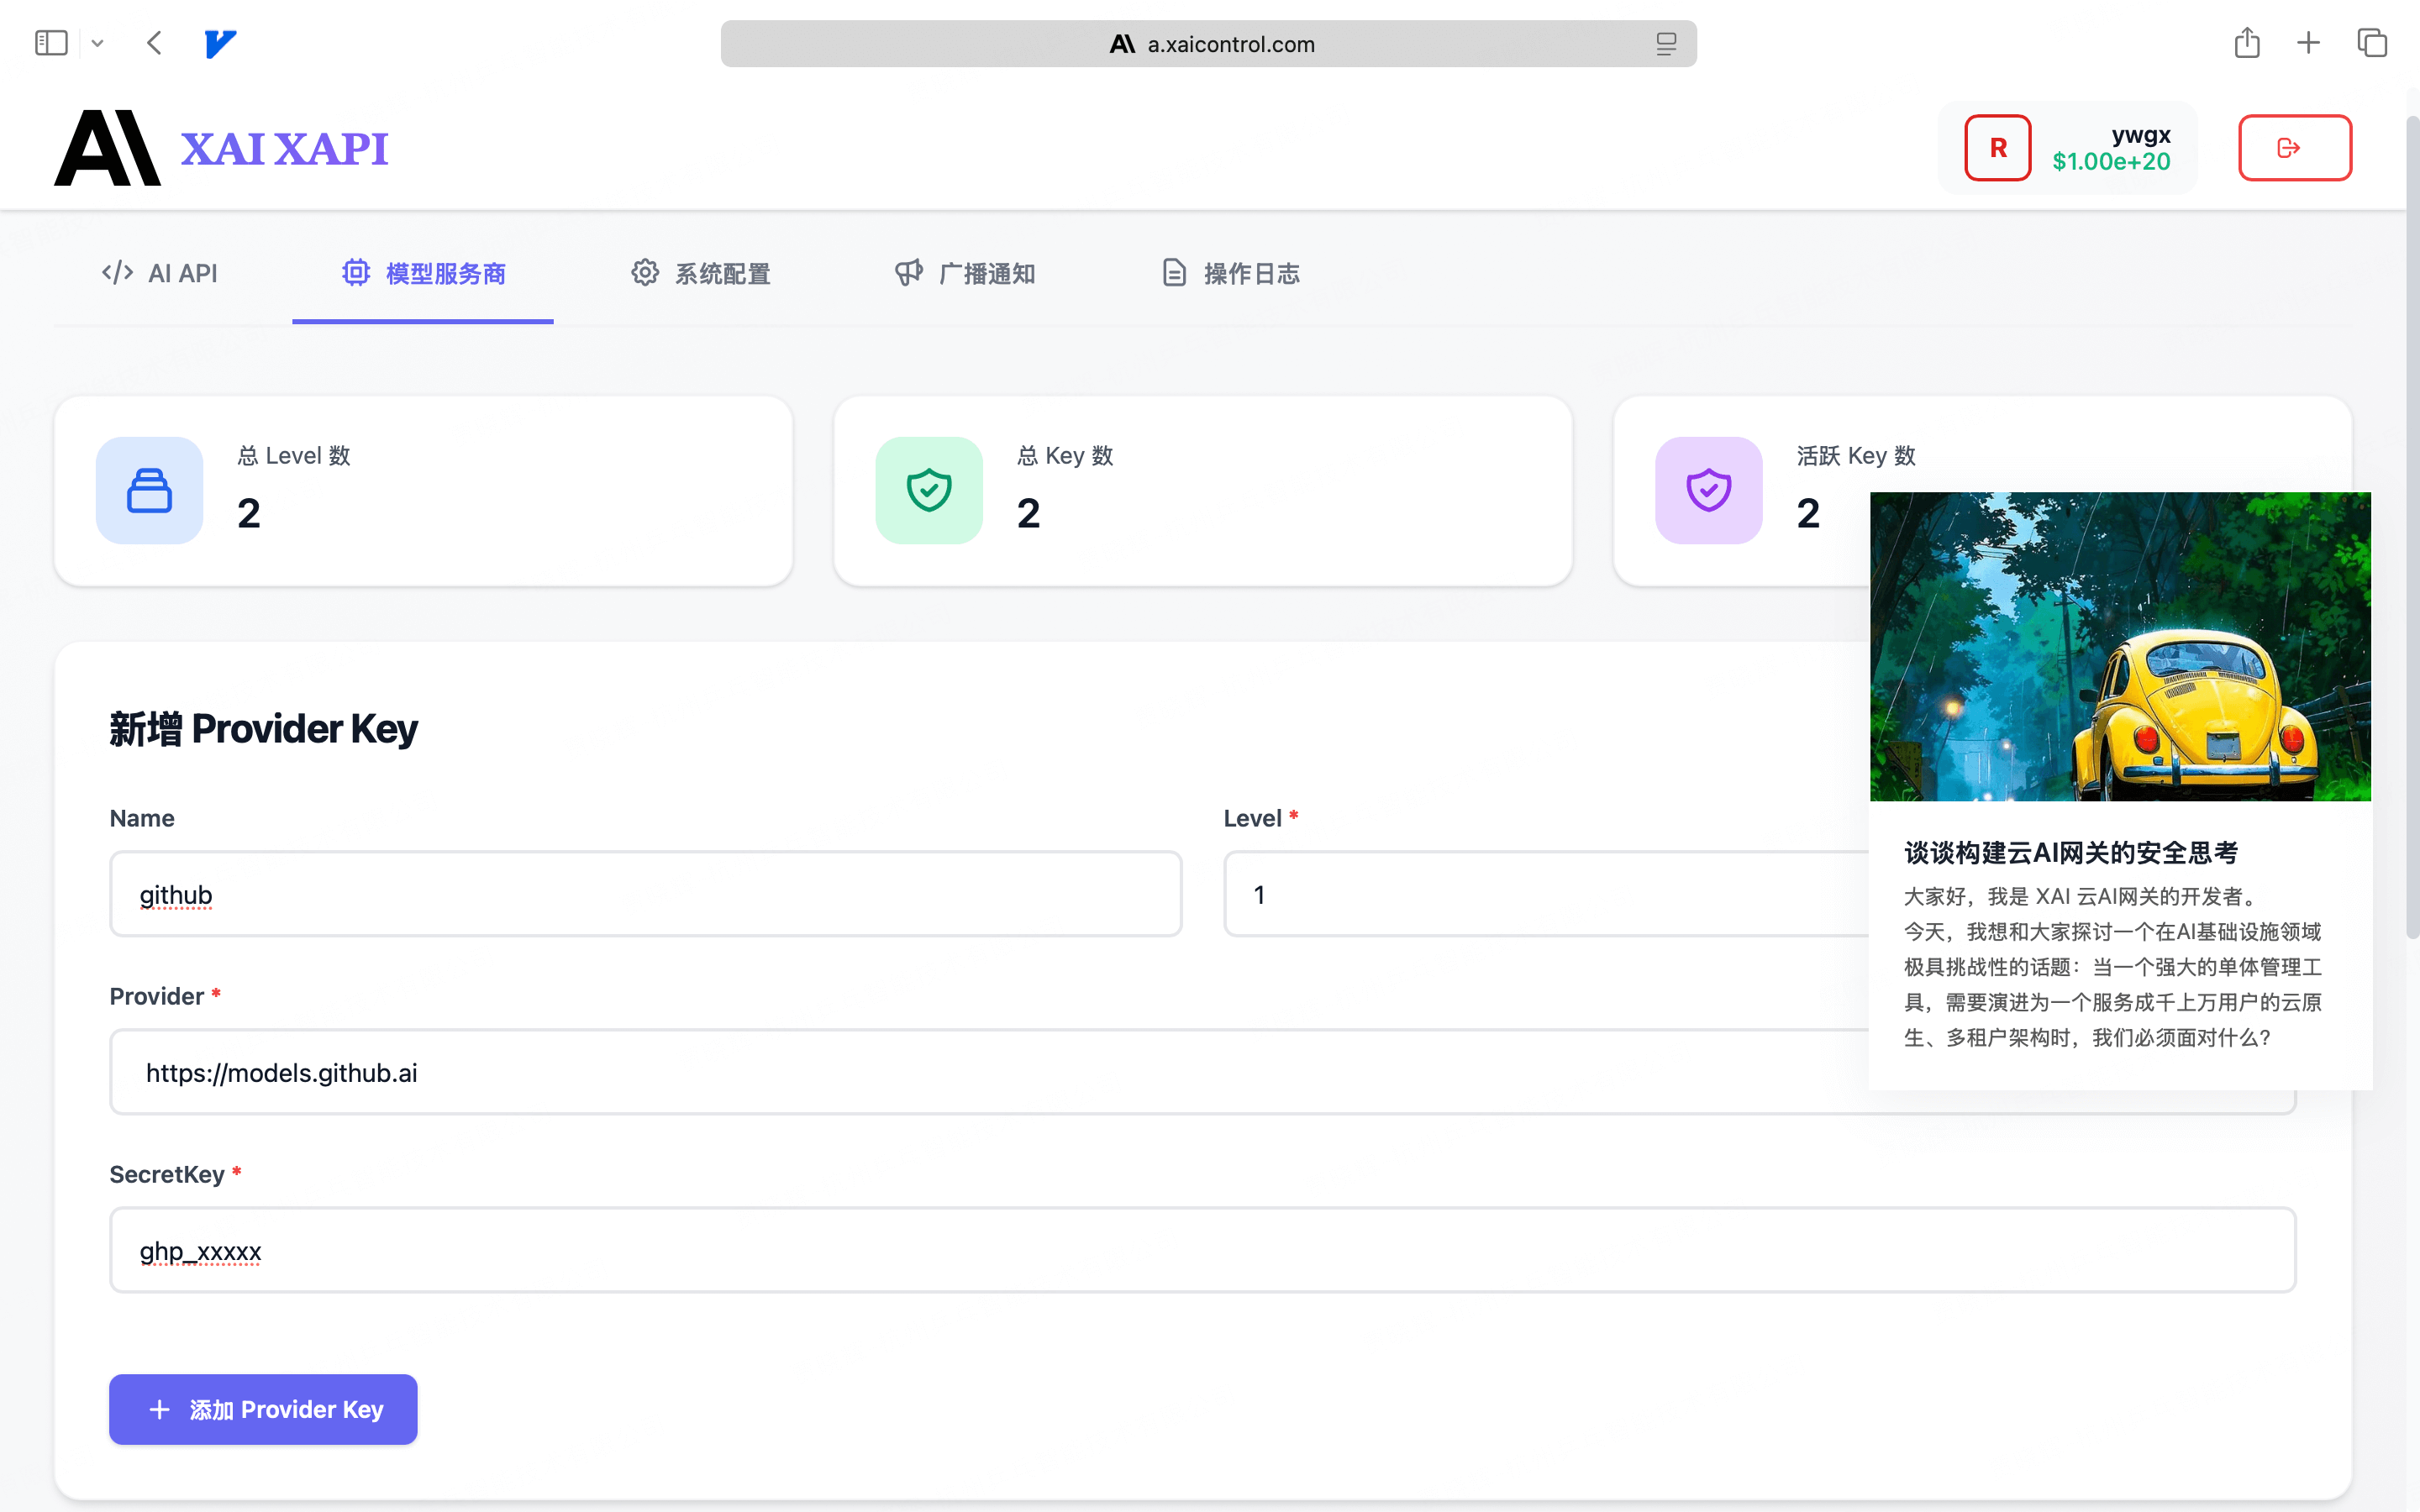
- Log in to your XAI Control account at a.xaicontrol.com.
- Navigate to "Providers" → "Add Provider Key".
- Add the first key, paying close attention to the
Levelsetting:- Name (Optional):
github-key-1 - Level:
1(This is our load balancing group number) - Provider:
https://models.github.ai - SecretKey: Paste your first generated
ghp_token.
- Name (Optional):
- Click "Add Provider Key" again to add the second key, ensuring the
Levelvalue is identical to the first:- Name (Optional):
github-key-2 - Level:
1(Keep it consistent with the previous key to place them in the same group) - Provider:
https://models.github.ai - SecretKey: Paste your second generated
ghp_token.
- Name (Optional):
- Repeat this process to add all your GitHub tokens under the same
Level.
Load Balancing and High Availability Design
The configuration you just completed is the core of XAI Control's powerful dispatching capabilities.
- Group as a Resource Pool: A
Level(group) in XAI Control defines a provider resource pool. A single model call request will be handled collectively by all keys under the sameLevel. - Automatic Polling and Increased Limits: When you add multiple keys under the same
Level(e.g., all set to1), the router will automatically perform round-robin calls among these keys. This means if a single PAT has an RPM (Requests Per Minute) limit of 30, and you add 3 PATs, the total RPM for thisLeveltheoretically increases to 90! - Automatic Failover: If a key returns an error due to hitting a rate limit or being invalid, XAI Control will immediately mark it as temporarily unavailable and automatically retry with the next healthy key. This process is transparent to your application, thus ensuring high service availability.
Step 3: Start Making Calls!
With all configurations in place, you can now start making requests using your XAI API Key (the key you received in an email after registering for XAI Control).
Open your terminal and run the following command:
# Replace "Your-XAI-API-Key" with the key you received
export XAI_API_KEY="Your-XAI-API-Key"

curl https://api.xaicontrol.com/v1/chat/completions \
  -H "Content-Type: application/json" \
  -H "Authorization: Bearer $XAI_API_KEY" \
  -d '{
      "model": "openai/gpt-4o",
      "messages": [
        {"role": "user", "content": "Write a function in Go to parse query parameters from a URL"}
      ],
      "stream": true
    }'
When you make this request, XAI Control will automatically select a healthy key from your configured Level 1 group to make the call. If you make multiple requests in succession, you will notice that the traffic is evenly distributed across all the GitHub tokens you added, easily bypassing the rate limit of a single key.
From Development to Production: Applying Load Balancing to Enterprise-Grade AI Providers
GitHub Models are primarily suited for prototyping and development scenarios. Their rate limits and stability may not meet the stringent requirements of a production environment.
When you are ready to move your application to production, you need official, high-availability AI services. The good news is that all the steps you just learned can be seamlessly applied to any enterprise-grade AI provider.
Example Scenario: Building a High-Availability Pool for OpenAI
Suppose your business relies on OpenAI, and you have purchased multiple API keys to increase your rate limits and availability. You can now configure them into a high-availability resource pool, just as you did with GitHub Models.
- Log in to your XAI Control account at a.xaicontrol.com.
- Navigate to "Providers" → "Add Provider Key".
- Add your multiple OpenAI keys to the same
Levelgroup:
| Name (Optional) | Level (Group) | Provider (Service URL) | SecretKey (Your Key) |
|---|---|---|---|
openai | 10 | https://api.openai.com | sk-proj-xxxx... |
openai | 10 | https://api.openai.com | sk-proj-yyyy... |
openai | 10 | https://api.openai.com | sk-proj-zzzz... |
Configuration Highlights:
- Unified
Level: All production OpenAI keys are placed under the sameLevel(e.g.,10) to form a unified resource pool. - Unified
Provider: The provider URL consistently points to the officialhttps://api.openai.com. - Automatic Dispatching: When your application calls
gpt-4othrough XAI Control, the router will automatically perform load balancing and failover among the keys inLevel=10.
In this way, XAI Control is not just a great tool for managing free models from GitHub, but also the central hub for building a high-availability, scalable, and unified production-grade AI service architecture. You can create similar load-balancing pools for any provider, including OpenAI, Anthropic, DeepSeek, and Google Gemini.
Step 4 (Optional): Assigning Model Access to Your Team or Clients
Congratulations! You have created a high-availability resource pool for your AI services. Now, the most crucial step is to securely and controllably distribute this powerful capability to your team members or clients.
This is where XAI Control's sub-account system shines.
Remember the two core management portals for XAI Control:
a.xaicontrol.com: The Resource Management Portal, where you, as the main account holder, configure upstream Provider Keys (just as you did).m.xaicontrol.com: The Account Management Portal, where you create and manage sub-accounts, and allocate credits and permissions.
Steps
Log in to the Account Management Portal Use your main account's email and password to log in to m.xaicontrol.com.
Create a Sub-Account Go to the "Create Sub-Account" page to create a new account for your team member or client and set an initial credit limit. Once the sub-account is created, the system will automatically email their dedicated
XAI API Keyto them.Configure Fine-Grained Permissions This is the most critical step. By clicking "Update Sub-Account", you can apply fine-grained controls:
Setting Description Example Configuration for This Scenario Credit Limit The maximum amount (in USD) the sub-account can consume. 50.00Model Allowlist Crucial: Restricts the sub-account to call only the models you permit. ["openai/gpt-4o", "xai/grok-3-mini"]
(Only allows calling the models you configured)RPM/TPM Limits Controls the sub-account's call rate to prevent abuse. RPM: 100, TPM:200000IP Allowlist Enhances security by allowing calls only from specified IPs. ["192.168.1.0/24"]
Core Advantages
With this approach:
- Security Isolation: Your sub-account users use their own API keys and have no access to the upstream GitHub PATs or official API keys you configured.
- Cost Control: You can set independent credit limits and model permissions for each sub-account, enabling precise cost management and billing.
- Permission Minimization: The model allowlist ensures that sub-accounts can only access the specific models you have authorized, preventing unauthorized usage.
Now, your team members or clients can use their own XAI API Keys to securely and reliably call the AI model resources you've configured, with all usage and permissions remaining under your complete control.