Configure the Claude Code Plugin in VS Code
Posted September 29, 2025 by XAI Technical Team ‐ 2 min read
In addition to using it in the terminal, you can seamlessly integrate Claude Code configuration into Visual Studio Code to enjoy the convenience of coding directly within the editor.
Step A: Install Claude Code Plugin
Install the official Claude Code Plugin
Step B: Configure Plugin to Use XAI Control
We need to tell the VS Code plugin to use XAI Control's service address and your API key.
1. Configure Service Address (API Base URL)
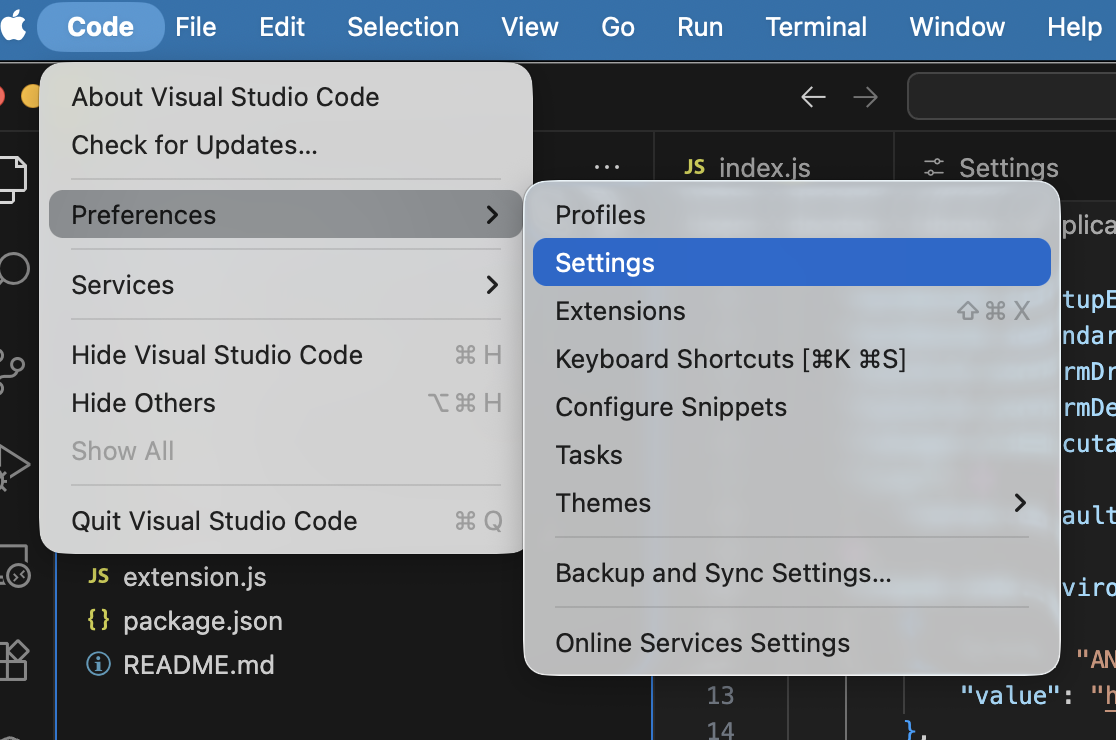
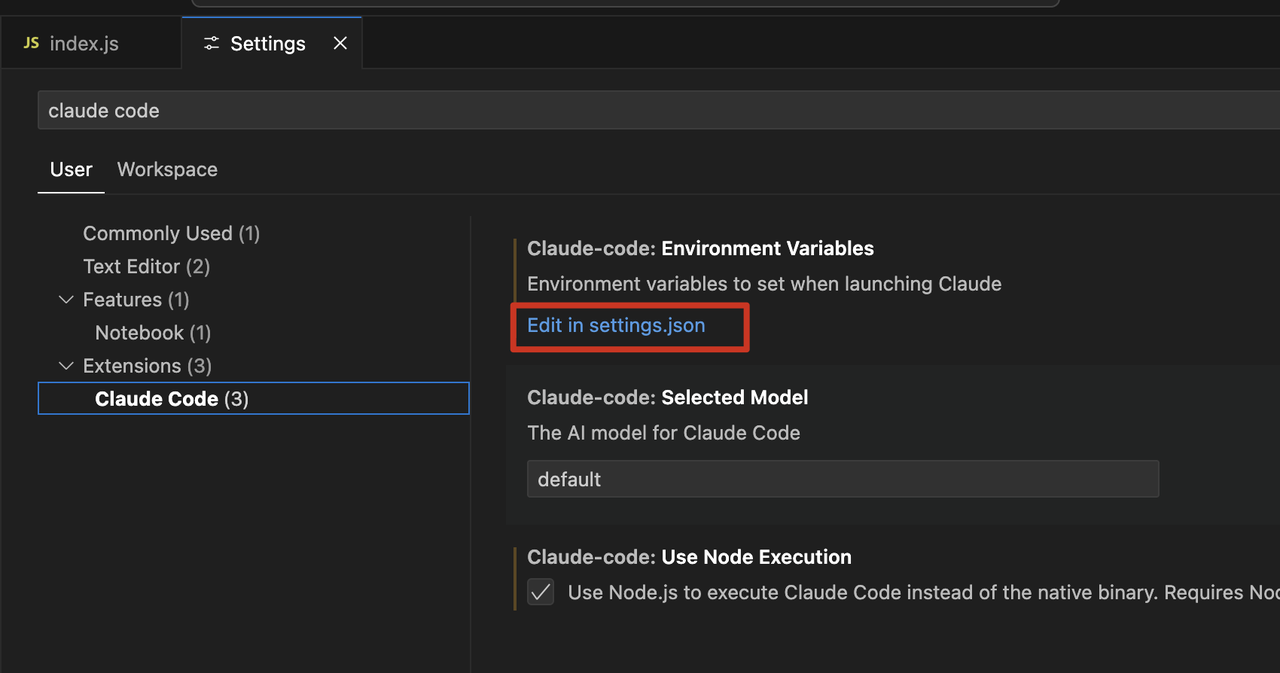
- Open VS Code settings (shortcut
Ctrl+,orCmd+,). - Type
claude-code.environmentVariablesin the search box. - Under the found setting, click "Edit in settings.json".
- Add the following JSON block to your
settings.jsonfile. If this setting already exists, make sure the content is merged correctly.
"claude-code.environmentVariables": [
    {
        "name": "ANTHROPIC_BASE_URL",
        "value": "https://api.xaicontrol.com"
    }
]
2. Configure Authentication Key (API Key)
- Unlike the CLI, the VS Code plugin typically reads the key through a specific configuration file.
- You need to create a folder named
.claudein your user home directory, and create aconfig.jsonfile within it.
For macOS/Linux, open terminal and execute:
mkdir -p ~/.claude
echo '{"primaryApiKey": "Your XAI API Key"}' > ~/.claude/config.json
For Windows, open PowerShell and execute:
New-Item -ItemType Directory -Force -Path "$HOME\.claude"
Set-Content -Path "$HOME\.claude\config.json" -Value '{"primaryApiKey": "Your XAI API Key"}'
- Make sure to replace
Your XAI API Keywith your actual XAI Control API key.
Step C: Restart and Start Using
- Completely exit and restart VS Code to ensure all configurations take effect.
- Click the Claude icon in the VS Code activity bar to open the chat window and start a conversation.
- You can now interact with Claude directly in VS Code, and all requests will be managed and logged through XAI Control.