How to Use Claude Code Seamlessly with XAI Control
Posted October 6, 2025 ‐ 8 min read
Claude Code is a powerful terminal-based AI coding assistant from Anthropic. While it typically requires an official subscription, its configurable API endpoint provides a more flexible solution: building a dedicated relay service through XAI Control, powered by your own Claude account.
This guide will walk you through the entire process, allowing you to enjoy the powerful features of Claude Code while benefiting from the security, cost control, and unified management provided by XAI Control.
• Claude Code (API Key Integration)
• Gemini CLI (API Key Integration)
Prerequisites
Before you begin, please ensure you have the following:
- An official Anthropic Claude Code Pro/Max account.
- An XAI Control account: If you don't have one, sign up for free at a.xaicontrol.com and be sure to read the documentation at xaixapi.com/docs/products/xai-control.
Step 1: Install the Claude Code CLI
Claude Code officially recommends using native binary installation, which requires no Node.js dependency and is more stable with built-in auto-update functionality.
📖 Official Setup Guide: https://docs.claude.com/en/docs/claude-code/setup
macOS Installation
Method 1: Using Homebrew (Recommended)
brew install --cask claude-code
Method 2: Using Official Installation Script
curl -fsSL https://claude.ai/install.sh | bash
Windows Installation
Method 1: Using PowerShell (Recommended)
irm https://claude.ai/install.ps1 | iex
Method 2: Using CMD
curl -fsSL https://claude.ai/install.cmd -o install.cmd && install.cmd && del install.cmd
Verify the Installation
Once the installation is complete, enter the following command to check if it was successful:
claude doctor
This will display your installation type and version information.
Install Specific Version (Optional)
If you need to install a specific version of Claude Code:
# Install stable (default)
curl -fsSL https://claude.ai/install.sh | bash

# Install latest
curl -fsSL https://claude.ai/install.sh | bash -s latest

# Install specific version (e.g., 1.0.58)
curl -fsSL https://claude.ai/install.sh | bash -s 1.0.58
Step 2: Get Your CLAUDE_CODE_OAUTH_TOKEN
This token serves as the authorization credential for your Claude account.
- Run the following command in your terminal to generate an authorization link:
claude setup-token - Copy the
https://claude.ai/oauth/authorize?...link and open it in your browser.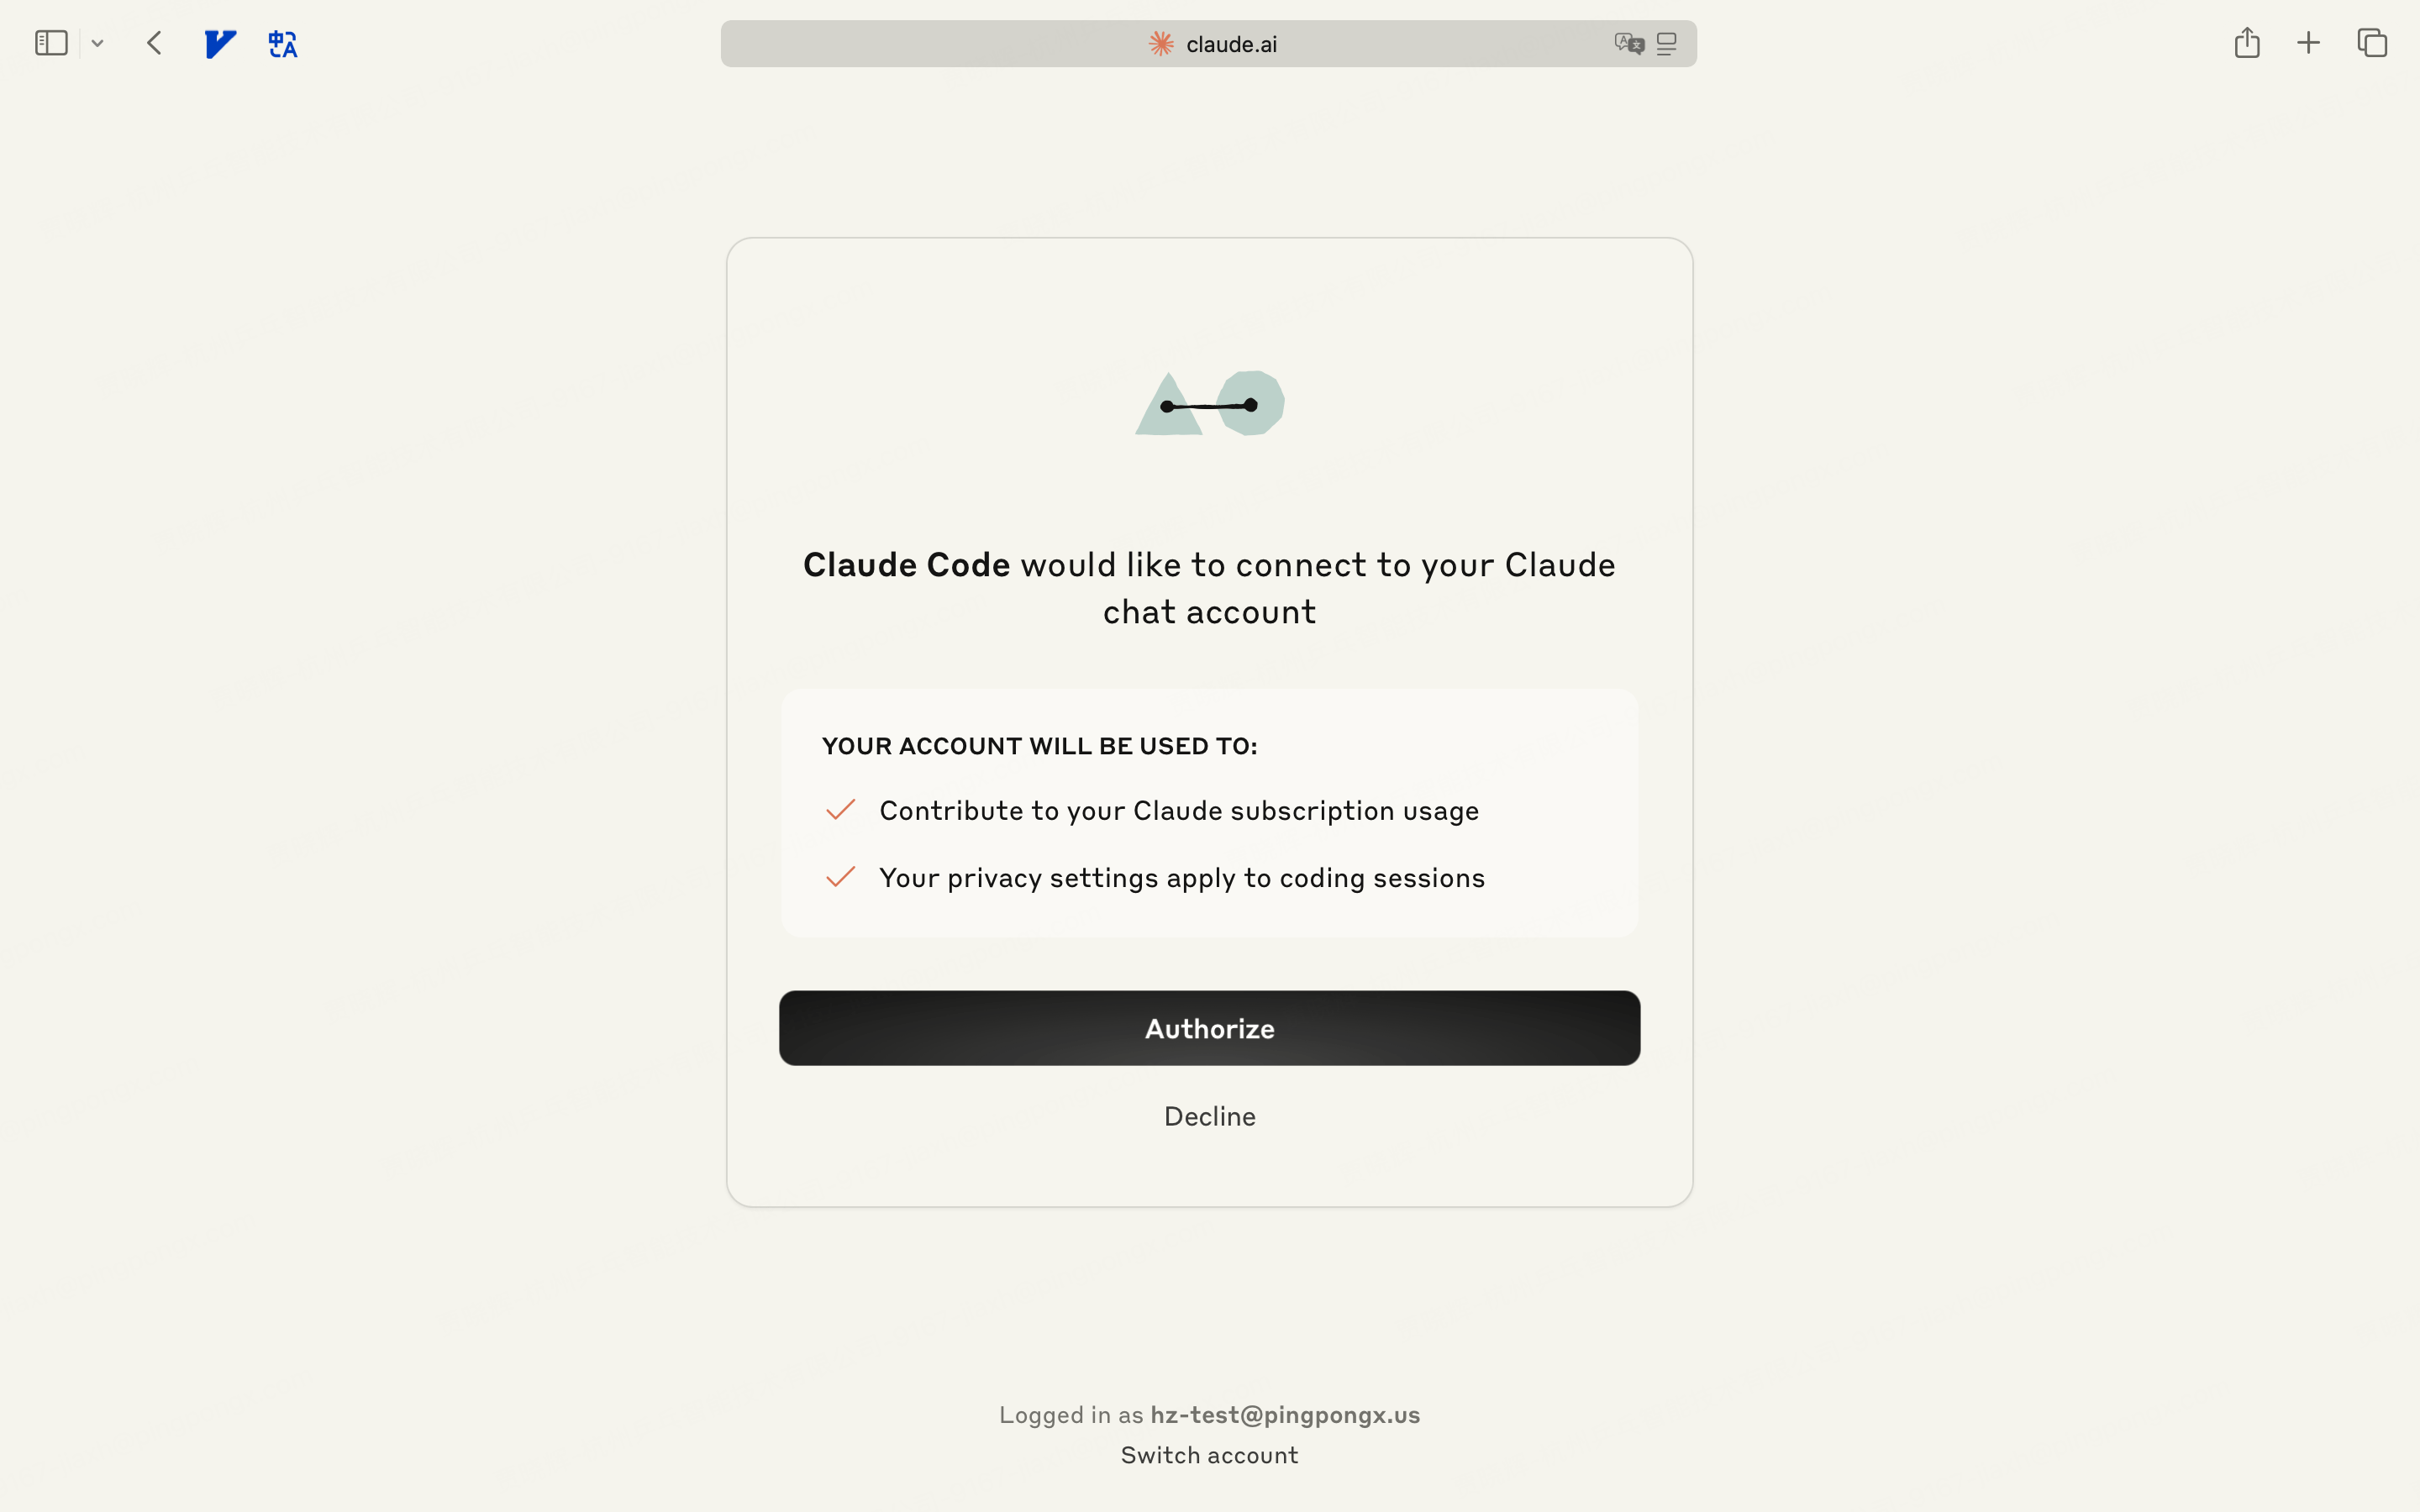
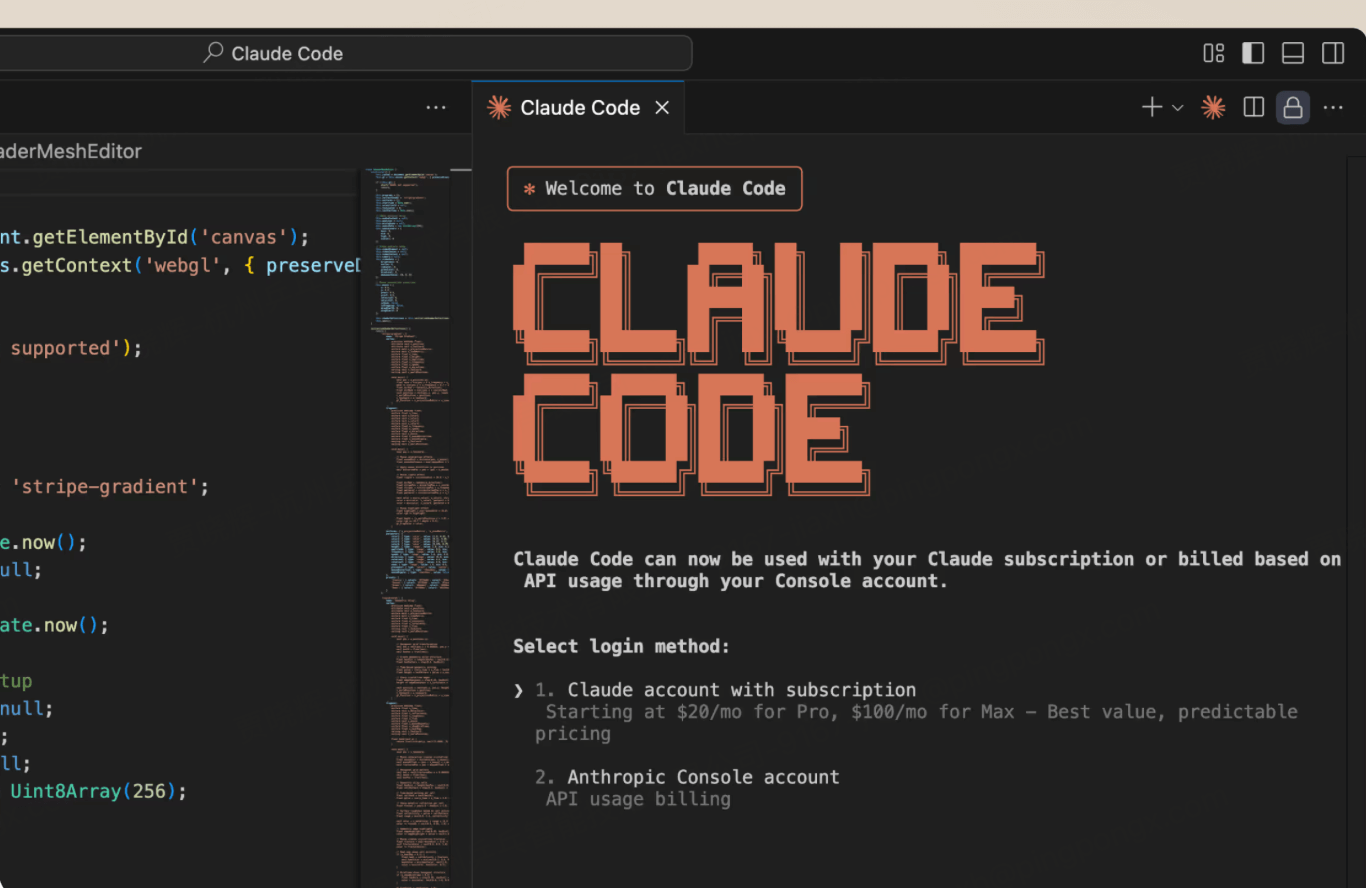
- Log in and click
Authorize. - The browser will redirect and display an
Authentication Code. Copy it. - Return to your terminal, paste the copied code, and press Enter.
- The terminal will generate a string starting with
sk-ant-oat01. This is theCLAUDE_CODE_OAUTH_TOKENwe need. Please keep it safe.
Step 3: Configure the Model Provider in XAI Control
Next, we will securely add your CLAUDE_CODE_OAUTH_TOKEN to XAI Control, allowing it to act as your key relay.
- Log in to your XAI Control account: a.xaicontrol.com.
- Navigate to the "Model Providers" menu and click "Add New Provider Key".
- Fill out the form with the following information:
- Name (Optional):
Claude Code(or any name for easy identification). - Level:
1(or any positive integer for grouping). - Provider:
http://172.31.88.86:7789(This is the multi-tenant Claude Code conversion service we provide). - SecretKey: Paste the
sk-ant-oat01...token you obtained in Step 2.
- Name (Optional):
- Click "Add Provider Key".
Step 4: Configure Local Environment Variables
This is the most crucial step. We need to tell the local claude command to use the XAI Control service URL and your XAI API Key.
Important Note
- When you successfully register for XAI Control, you will receive an email with the subject "Welcome to XAI - Your Account is Ready!" which contains your unique XAI API Key.
- The
ANTHROPIC_AUTH_TOKENyou are about to configure must be your XAI API Key, not theCLAUDE_CODE_OAUTH_TOKENfrom the previous step.
macOS Configuration
Method 1: Temporary Setup (Current Session Only)
export ANTHROPIC_BASE_URL="https://api.xaicontrol.com"
export ANTHROPIC_AUTH_TOKEN="Your_XAI_API_Key_Here"
Method 2: Permanent Setup (Recommended)
# For zsh (macOS default)
echo 'export ANTHROPIC_BASE_URL="https://api.xaicontrol.com"' >> ~/.zshrc
echo 'export ANTHROPIC_AUTH_TOKEN="Your_XAI_API_Key_Here"' >> ~/.zshrc
source ~/.zshrc

# For bash
echo 'export ANTHROPIC_BASE_URL="https://api.xaicontrol.com"' >> ~/.bash_profile
echo 'export ANTHROPIC_AUTH_TOKEN="Your_XAI_API_Key_Here"' >> ~/.bash_profile
source ~/.bash_profile
Windows Configuration
Method 1: Temporary Setup in PowerShell (Current Window Only)
$env:ANTHROPIC_BASE_URL = "https://api.xaicontrol.com"
$env:ANTHROPIC_AUTH_TOKEN = "Your_XAI_API_Key_Here"
Method 2: Permanent Setup in PowerShell (User-Level)
# Set user-level environment variables (permanent)
[System.Environment]::SetEnvironmentVariable("ANTHROPIC_BASE_URL", "https://api.xaicontrol.com", [System.EnvironmentVariableTarget]::User)
[System.Environment]::SetEnvironmentVariable("ANTHROPIC_AUTH_TOKEN", "Your_XAI_API_Key_Here", [System.EnvironmentVariableTarget]::User)
Note: After setting this, you must reopen a new PowerShell window for the changes to take effect.
Step 5: Start Using!
🎉 Congratulations! All configurations are complete. You can now interact with Claude Code in your terminal just as you would with the official service.
Example 1: Direct Question
claude "Write a simple HTTP file server in Go"
Example 2: Explain Existing Code
cat main.go | claude "Explain the logic of this Go code"
Example 3: Interactive Mode
claude
> How can I help you today?
> write a dockerfile for a node.js app
All requests made through the claude command will now be intelligently routed via api.xaicontrol.com to the Claude token you configured in XAI Control. You can monitor all usage clearly in your XAI Control dashboard at m.xaicontrol.com.
VS Code: Configure the Claude Code Plugin in VS Code
In addition to using it in the terminal, you can seamlessly integrate this setup into Visual Studio Code to enjoy the convenience of coding directly within your editor.
Step A: Install the Claude Code Plugin
Install the official Claude Code Plugin
Step B: Configure the Plugin to Use XAI Control
We need to tell the VS Code plugin to use XAI Control's service address and your API key.
Configure the API Base URL
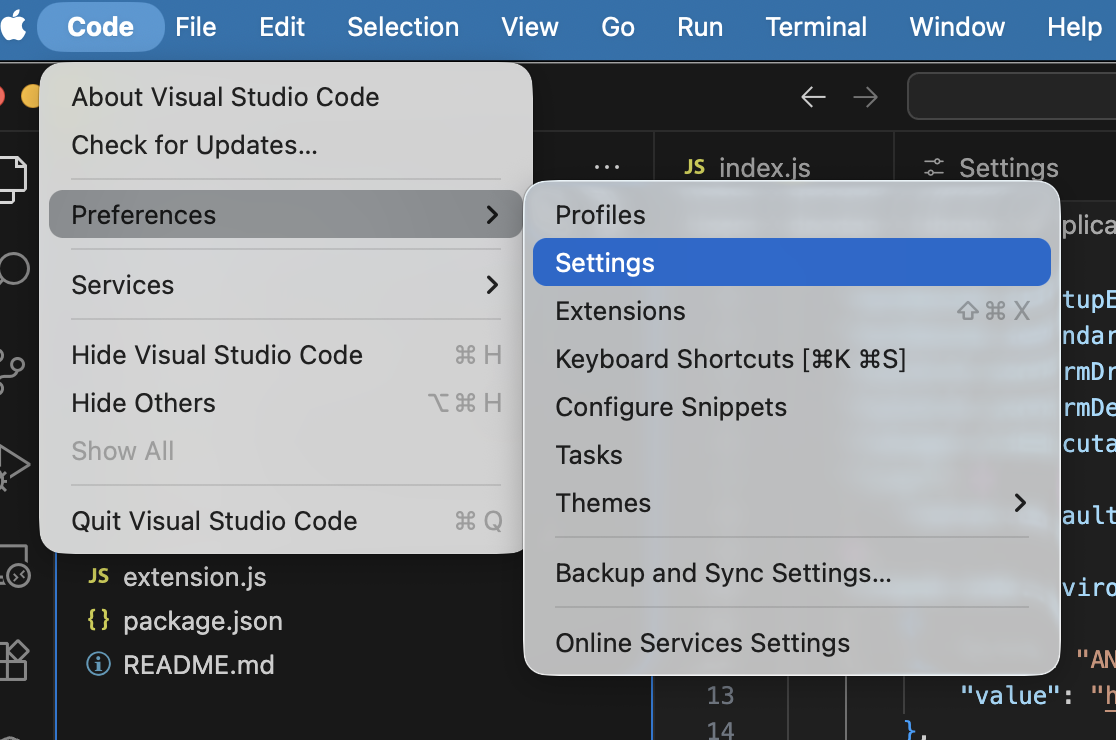
- Open VS Code settings (shortcut:
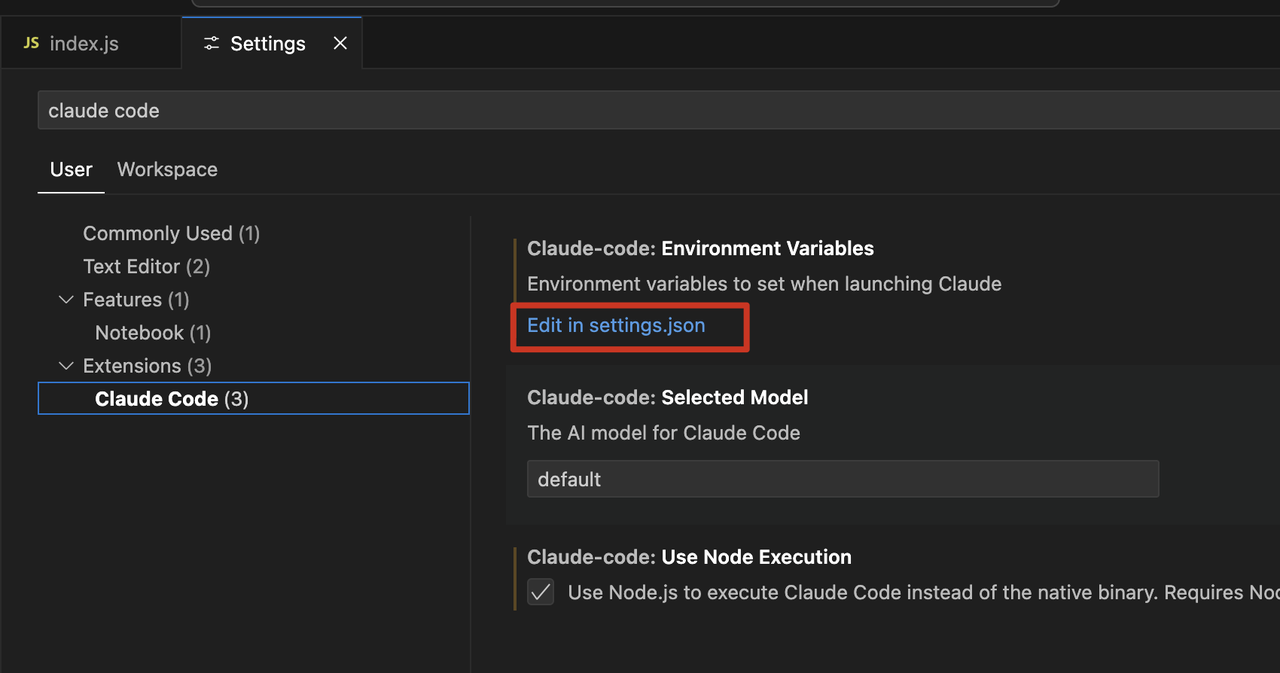
Ctrl+,orCmd+,). - In the search box, type
claude-code.environmentVariables. - In the found setting, click "Edit in settings.json".
- Add the following JSON block to your
settings.jsonfile. If this setting already exists, make sure to merge the content correctly.
"claude-code.environmentVariables": [ { "name": "ANTHROPIC_BASE_URL", "value": "https://api.xaicontrol.com" } ]- Open VS Code settings (shortcut:
Configure the Authentication Key (API Key)
- Unlike the CLI, the VS Code plugin typically reads the key through a specific configuration file.
- You need to create a folder named
.claudein your user home directory and create aconfig.jsonfile within it. - For macOS/Linux, open the terminal and execute:
mkdir -p ~/.claude echo '{"primaryApiKey": "Your_XAI_API_Key_Here"}' > ~/.claude/config.json - For Windows, open PowerShell and execute:
New-Item -ItemType Directory -Force -Path "$HOME\.claude" Set-Content -Path "$HOME\.claude\config.json" -Value '{"primaryApiKey": "Your_XAI_API_Key_Here"}' - Be sure to replace
Your_XAI_API_Key_Herewith your actual XAI Control API key.
Step C: Restart and Start Using
- Completely quit and restart VS Code to ensure all configurations take effect.
- Click the Claude icon in the VS Code activity bar to open the chat window and start a conversation.
- You can now interact with Claude directly in VS Code. All requests will be managed and logged through XAI Control.
Related Claude Code Resources
- Claude Code Official Setup Guide: Official installation and configuration guide
- Claude Code Official Documentation: Complete Claude Code usage documentation
- Claude Code Official Website: Learn about Claude Code's features and capabilities
- Claude Code GitHub Repository: Source code, issue tracking, and advanced usage
- Claude Programming Best Practices: Master core techniques of AI agent programming
- AI Programming Best Practices: In-depth analysis of how to fully leverage Claude Code's potential
Why Choose This Method?
- Centralized Management: Manage all your model keys for OpenAI, Anthropic, Gemini, and more in one place at a.xaicontrol.com.
- User Management: Allocate and manage your AI resources for sub-users or team members through the dashboard at m.xaicontrol.com.
- Secure and Reliable: Your original tokens are never exposed in your local environment. They are stored with zero-trust encryption, eliminating the risk of leaks.
- Cost and Permission Control: Leverage XAI Control's powerful sub-account system to create separate keys for team members or projects with fine-grained control over quotas, model access, and rate limits.
- High Availability: Benefit from enterprise-grade features like failover and key rotation provided by XAI Control to ensure service stability.